
Want cannoli flavor without frying shells or hunting down metal tubes? This mini cannoli cups recipe gives you crisp cinnamon-sugar pastry, thick ricotta cream and plenty of chocolate in two neat bites.
You can bake the shells and mix the filling ahead, then assemble everything shortly before serving. That timing keeps the pastry crunchy and saves you from party-hour chaos—because dessert really doesn’t need a dramatic entrance.
Jump to Recipe · Make-Ahead Tips · FAQs
Quick answer: Cut refrigerated pie crust into 2 1/2-inch rounds, shape the rounds in a mini muffin pan and bake them at 400°F for 10–12 minutes. Cool the shells completely, then pipe in a chilled mixture of drained ricotta, mascarpone, powdered sugar, vanilla and orange zest. Fill the cups within 30–60 minutes of serving for the crispest texture.
Mini Cannoli Cups at a Glance
| Detail | What to Know |
|---|---|
| Yield | About 24 mini cups |
| Prep time | 25 minutes |
| Bake time | 10–12 minutes at 400°F |
| Ricotta draining | At least 1 hour; overnight works best |
| Filling chill | 30 minutes |
| Best assembly | 30–60 minutes before serving |
| Main equipment | Mini muffin pan and 2 1/2-inch cutter |
Why This Mini Cannoli Cups Recipe Works
Traditional cannoli use tube-shaped fried shells. This recipe takes a different route: you bake pie crust in a mini muffin pan, then add cannoli-inspired ricotta cream. You get an easier party dessert, not a claim of Sicilian authenticity.
What makes this version reliable? Moisture control. Wet ricotta creates loose cream, and pale pastry turns soft quickly. Drain the cheese, bake the shells until golden and keep both components apart until serving time.
- Pie crust simplifies the shell. You skip deep frying and special molds.
- Mascarpone supports the filling. It adds body while ricotta keeps the lead flavor.
- Orange zest balances the sweetness. I prefer orange here because it pairs naturally with semisweet chocolate.
- The small size suits parties. Guests can grab one without juggling a fork, plate and life choices.
Serve the cups on a mixed tray with fresh berries or other strawberry dessert ideas when you want color and a fresh contrast.
Ingredients You’ll Need
For the Cinnamon-Sugar Shells
- 1 box refrigerated pie crusts, containing two 9-inch crusts
- 1 large egg
- 1 teaspoon water
- 2 tablespoons granulated sugar
- 1/2 teaspoon ground cinnamon
- All-purpose flour, for the work surface
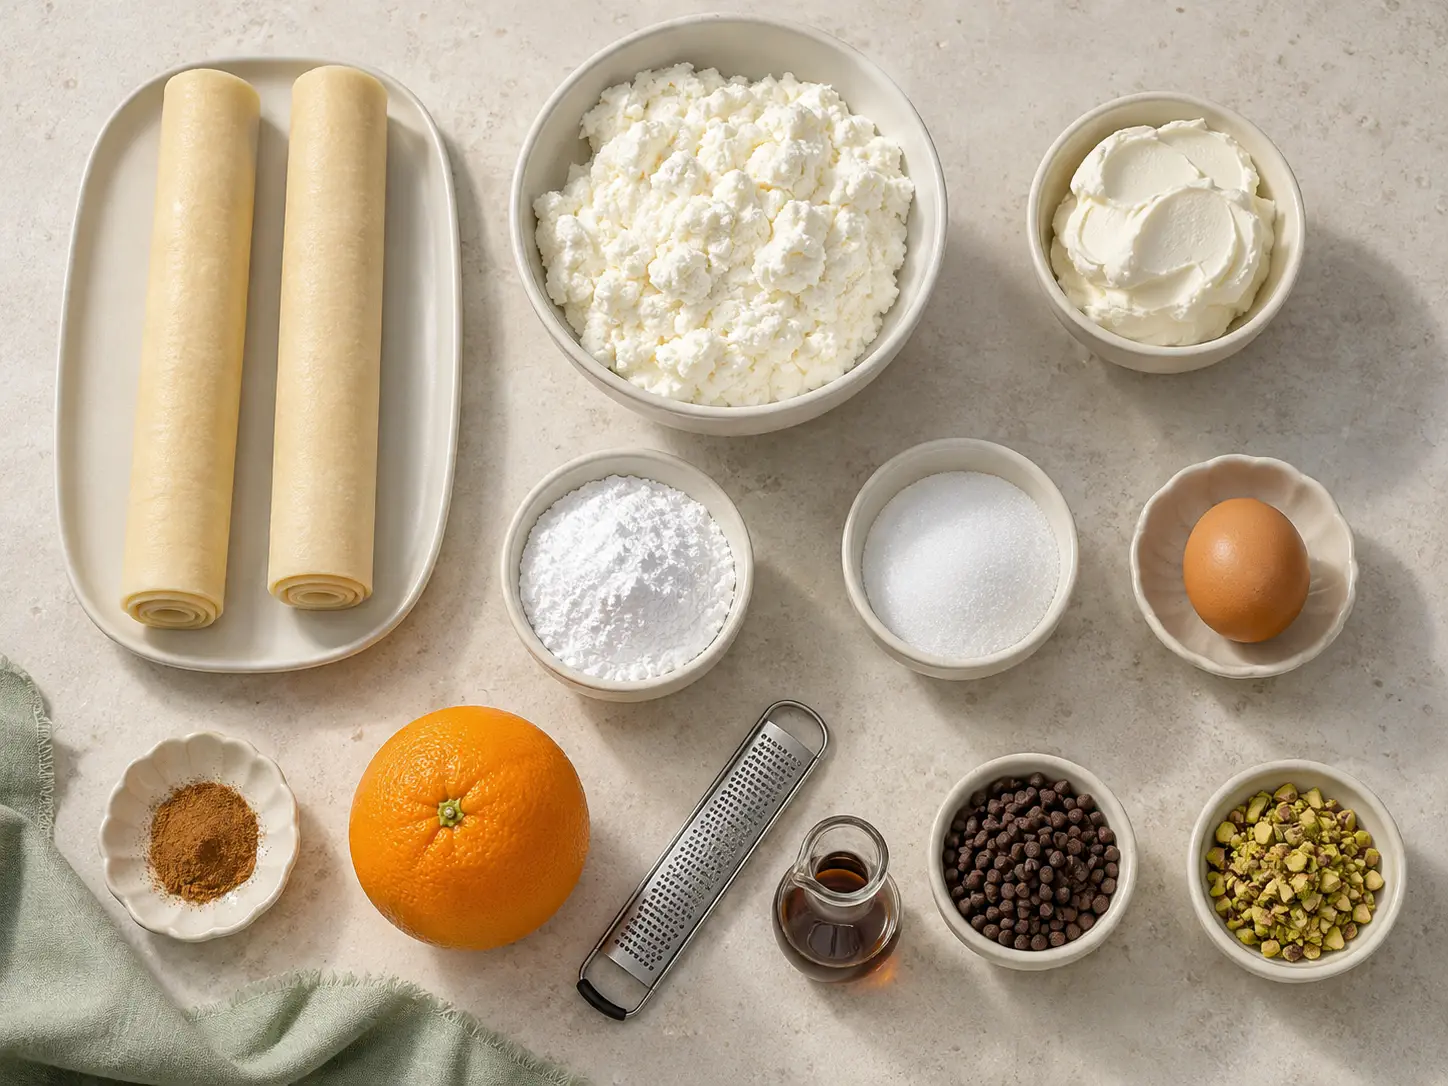
Keep the dough cold but flexible. Warm dough sticks and stretches, while rock-hard dough cracks. Follow the package directions, then adjust with a few minutes on the counter or in the refrigerator.
For the Creamy Ricotta Filling
- 15 ounces whole-milk ricotta, drained
- 4 ounces cold mascarpone
- 1/2 cup sifted powdered sugar
- 1 teaspoon finely grated orange zest
- 1 teaspoon pure vanilla extract
- 1 small pinch fine salt
- 1/3 cup mini semisweet chocolate chips, divided
- Powdered sugar and finely chopped pistachios, optional
Whole-milk ricotta gives you the richest texture. IMO, mascarpone earns its place because it helps the cream hold a tidy swirl without forcing you to add loads of sugar.
Allergen note: The recipe contains milk, wheat and egg. Pistachios add tree nuts, so label that variation clearly and check packaged ingredients when you serve anyone with allergies.
Drain the Ricotta Before You Mix
Ever wondered why cannoli filling sometimes runs across the plate? Ricotta often carries extra whey, and sugar won’t magically negotiate with it. Extra sugar only gives you sweeter, still-loose cream.
- Line a fine-mesh sieve with cheesecloth or two clean paper towels.
- Set the sieve over a bowl, add the ricotta, cover it and refrigerate it for at least 1 hour.
- Discard the liquid. The ricotta should hold its shape on a spoon.
Overnight draining gives you the safest texture for piping. Don’t squeeze the ricotta until it turns chalky; aim for thick and creamy, not desert-dry.
How to Make Mini Cannoli Cups
1. Prepare the Pan
Heat the oven to 400°F. Lightly coat 24 mini muffin wells with baking spray, then wipe away any puddles. Unroll both crusts on a lightly floured surface.
2. Cut and Shape the Dough
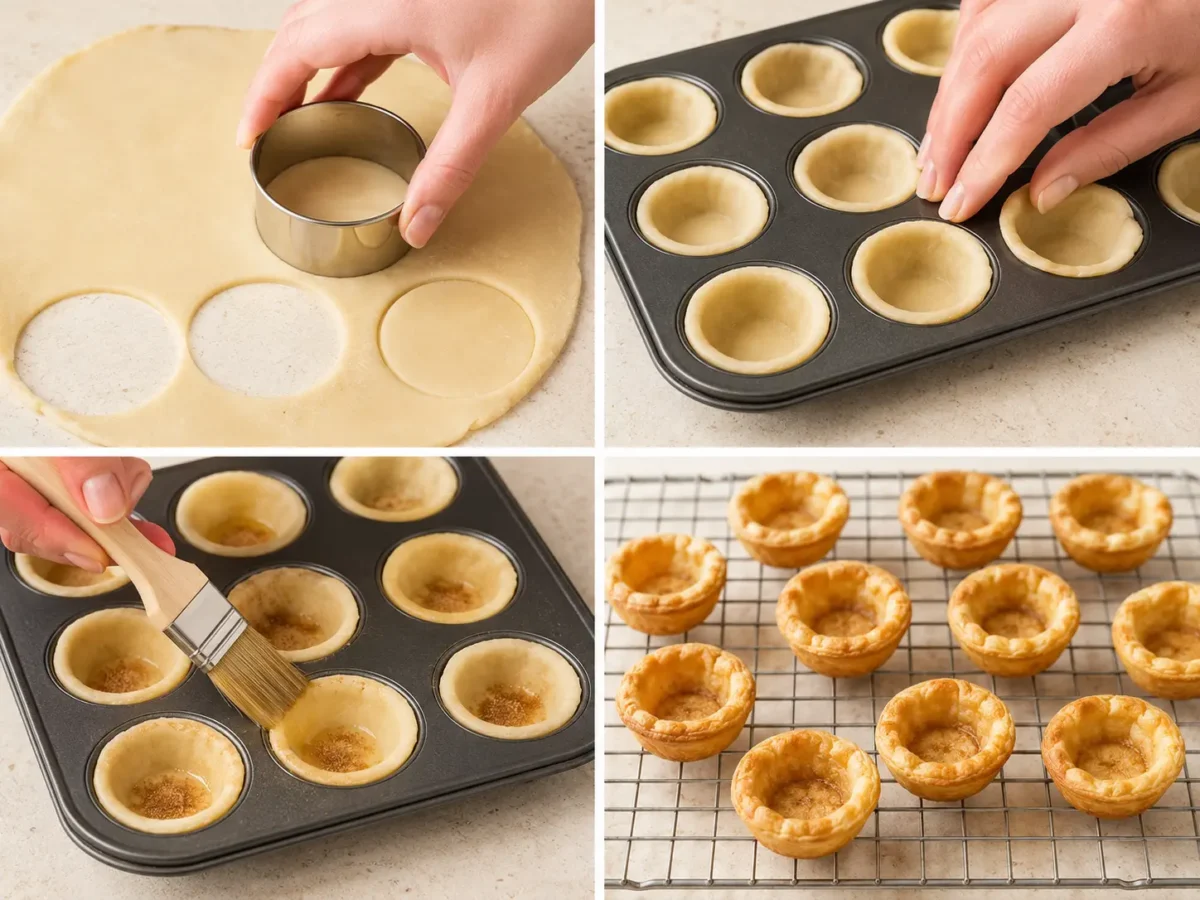
Cut 2 1/2-inch rounds as closely together as possible. Gather the scraps and re-roll them once to the original thickness. Press each round gently into a muffin well, keep the rim level and prick the base once with a fork.
Why only one re-roll? Every extra pass develops more gluten and can toughen the pastry. The scraps don’t need a full gym routine.
3. Add Cinnamon Sugar
Whisk the egg with 1 teaspoon water. Brush a very thin layer over the inside and rim of each cup. Mix the sugar and cinnamon, then sprinkle a little over the pastry.
4. Bake and Cool
Bake the shells for 10–12 minutes. Look for golden rims and golden bases; pale shells soften faster. Let them cool in the pan for 5 minutes, then move them to a wire rack.
Cool every shell completely. Warm pastry loosens the cream and traps condensation. FYI, “almost cool” still counts as warm when ricotta enters the chat.
5. Make the Cannoli Cream
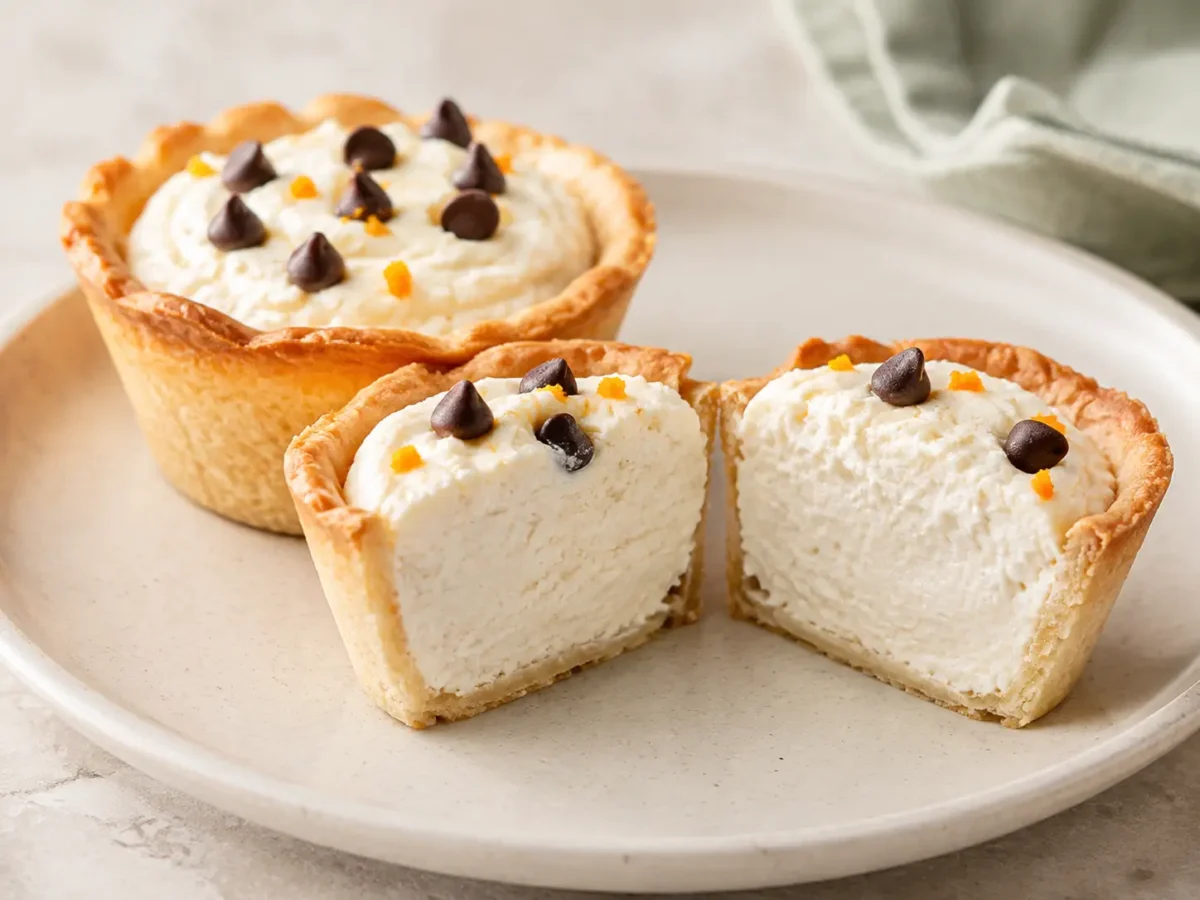
Mix the drained ricotta, cold mascarpone, powdered sugar, orange zest, vanilla and salt on low speed for 30–45 seconds. Stop as soon as the mixture looks smooth. Fold in half of the chocolate chips.
Spoon the cream into a piping bag with a large open-star tip, then chill it for 30 minutes. Brief mixing and cold ingredients help the filling keep its shape.
6. Fill and Finish
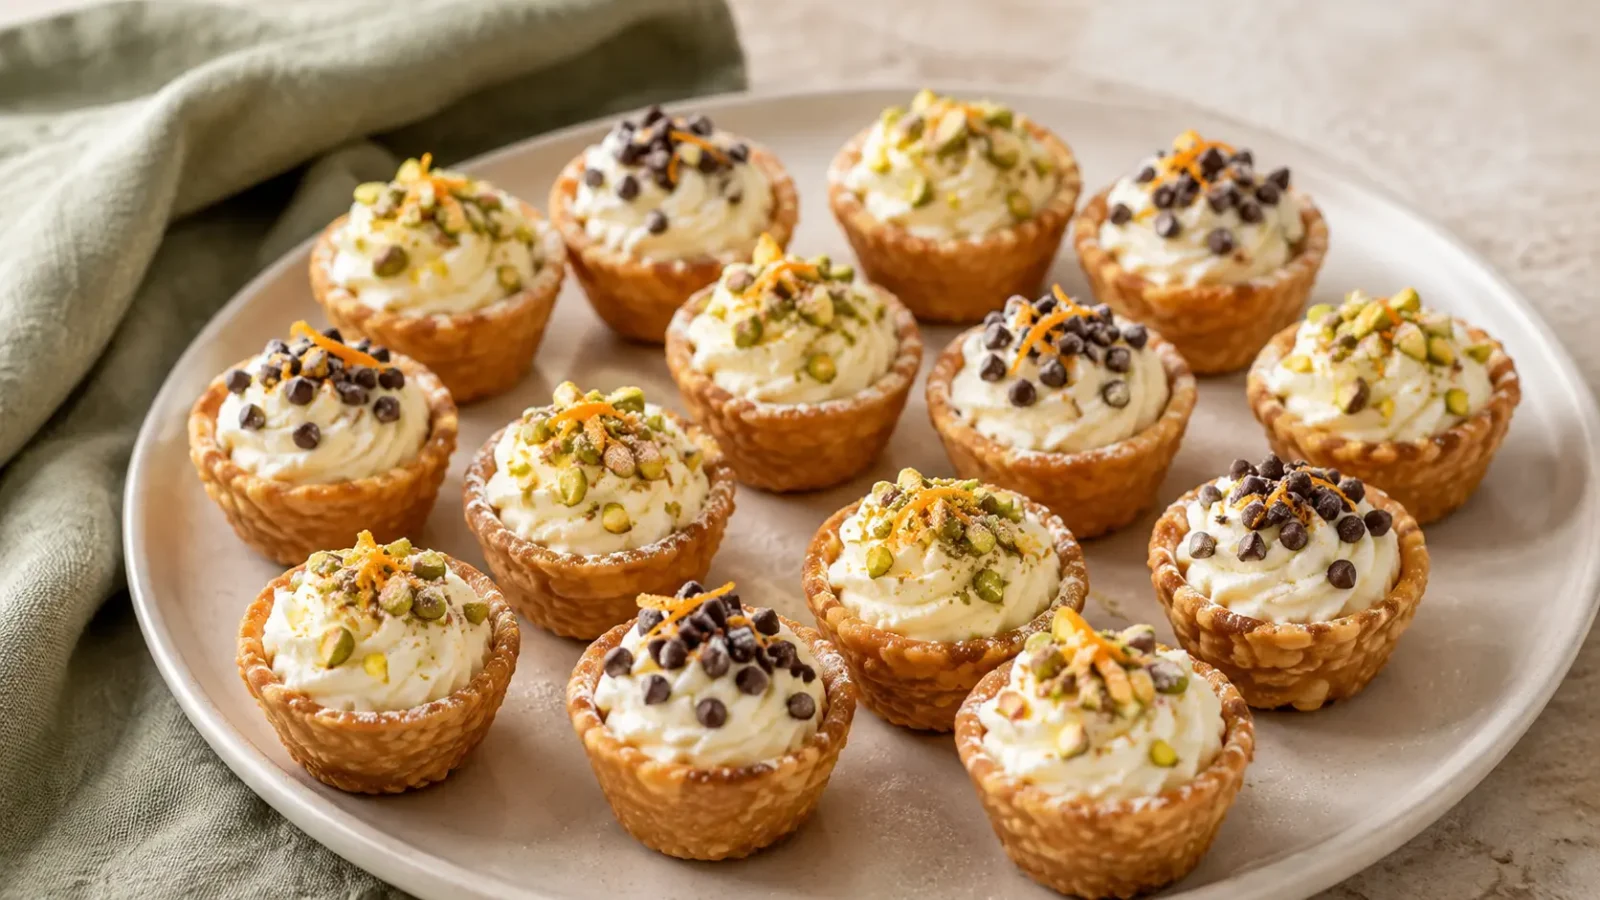
Pipe about 1 tablespoon of cream into every cooled shell. Add the remaining chocolate chips, optional pistachios and a light powdered-sugar dusting. Serve the mini cannoli cups promptly and enjoy the crisp-creamy contrast 🙂
How to Keep the Shells Crisp
What ruins a cannoli cup faster than wet filling? Time. Even perfect cream slowly transfers moisture to pastry, so keep the components separate and assemble them within 30–60 minutes of serving.
- Runny cream: Drain the ricotta longer, mix briefly and chill it.
- Soft shells: Bake them until the bases turn golden, then cool them fully.
- Puffed centers: Prick each base before baking.
- Tough cups: Re-roll the scraps only once.
Want extra insurance? Brush a thin coat of melted semisweet chocolate inside each cooled shell and let it harden before piping. You can echo that chocolate theme with these chocolate chip cookies.
Make-Ahead, Storage and Freezing
Up to two days ahead: Bake and cool the shells, then store them in an airtight container at room temperature. Keep them away from steam and humidity.
One day ahead: Drain the ricotta, mix the filling and refrigerate it in a covered container or sealed piping bag. The refrigerator handles the boring part while you focus on everything else.
Before serving: Fill and garnish the cups 30 60 minutes ahead. Refrigerate assembled cups and eat them within one day for the best quality, though the shells will soften over time.
Freeze only the unfilled baked shells for up to one month. Thaw them at room temperature, warm them at 325°F for 4–5 minutes if they need more crunch, and cool them before filling. Ricotta cream can separate after freezing.
For a buffet, put out a small batch and refill the platter from the refrigerator. The FDA says you should discard perishables after more than 2 hours at room temperature, or after 1 hour when the temperature rises above 90°F. Read the FDA’s safe buffet guidance for the full rule.
Easy Flavor Variations
- Lemon: Replace the orange zest with finely grated lemon zest.
- Pistachio: Skip the chips and use finely chopped pistachios.
- Chocolate-lined: Coat the shell interiors with melted semisweet chocolate.
- Phyllo: Use fully baked mini phyllo shells and fill them shortly before serving.
- No mascarpone: Add 4 more ounces of well-drained ricotta; expect a softer cream.
If convenient pastry desserts make you happy, try this cherry cheese Danish. For a cold summer option, pair the cups with a hot fudge ice cream bar dessert.
Mini Cannoli Cups FAQs
Can I make mini cannoli cups ahead?
Yes. Bake the shells up to two days ahead and make the filling one day ahead. Store them separately, then assemble the cups 30–60 minutes before serving.
Why does my cannoli filling turn runny?
Wet ricotta usually causes loose filling. Drain it for at least one hour, use cold mascarpone, mix for only 30–45 seconds and chill the cream before piping.
Do cannoli cups need refrigeration?
Keep empty shells at room temperature in an airtight container. Refrigerate the filling and every assembled cup because they contain fresh dairy.
Can I use phyllo cups instead of pie crust?
Yes. Phyllo creates a thinner, flakier cup, so follow the package directions and add the filling close to serving.
Can I freeze mini cannoli cups?
Freeze only the empty baked shells. The freezer can make ricotta filling watery, and assembled cups lose their crisp texture after thawing.
Make These Mini Cannoli Cups Next
Drain the ricotta, bake the pastry until golden and wait to assemble. Those three choices give you neat cream, crisp shells and far less dessert drama. Add chocolate chips, pistachios or both, then tell us your favorite topping in the comments and browse more ideas in the RecipeCrave dessert collection.
Mini Cannoli Cups Recipe With Creamy Ricotta Filling
Ingredients
Equipment
Method
- Drain the ricotta: Line a fine-mesh sieve with cheesecloth or two clean paper towels and set it over a bowl. Add the ricotta, cover, and refrigerate for at least 1 hour or overnight. Discard the drained liquid. The ricotta should be thick and hold its shape on a spoon.
- Prepare the oven and pan: Preheat the oven to 400°F (204°C). Lightly coat 24 wells of a mini muffin pan with baking spray, wiping away any excess. Unroll both pie crusts on a lightly floured work surface.
- Cut the pastry: Cut the dough into 2 1/2-inch (6.4-cm) rounds, placing the cuts close together to minimize scraps. Gather and re-roll the remaining pastry only once, keeping it close to its original thickness.
- Shape the cups: Gently press one pastry round into each mini muffin well. Keep the upper edges reasonably level and prick the bottom of every cup once with a fork to reduce puffing.
- Add the cinnamon sugar: Whisk the egg with 1 teaspoon (5 ml) water. Lightly brush the inside and rim of each pastry cup with the egg wash. Combine the granulated sugar and cinnamon, then sprinkle a small amount over each shell.
- Bake: Bake for 10 to 12 minutes, or until both the rims and bases are golden. Proper browning helps the shells remain crisp after filling.
- Cool: Leave the shells in the pan for about 5 minutes, then carefully transfer them to a wire rack. Cool completely before adding the ricotta filling.
- Make the cannoli cream: Place the drained ricotta, cold mascarpone, sifted powdered sugar, orange zest, alcohol-free vanilla flavoring, and salt in a mixing bowl. Mix on low speed for 30 to 45 seconds, stopping as soon as the filling becomes smooth.
- Fold half of the mini semisweet chocolate chips into the ricotta mixture. Avoid excessive mixing, which can make the filling looser.
- Chill the filling: Transfer the ricotta cream to a piping bag fitted with a large open-star tip. Refrigerate for 30 minutes so the filling becomes firm enough to hold a neat swirl.
- Fill the cups: Pipe approximately 1 tablespoon of chilled cannoli cream into each completely cooled pastry shell. For the crispest texture, assemble the cups within 30 to 60 minutes of serving.
- Finish and serve: Sprinkle the remaining mini chocolate chips over the cups. Add finely chopped pistachios and a light dusting of powdered sugar if desired. Keep assembled cannoli cups refrigerated until serving.



Pingback: Witches Brew Punch: Easy 3-Ingredient Halloween Drink