
Peanut Butter Spider Cookies
Looking for a fun Halloween treat that is cute, chocolatey, and easy to make? These Peanut Butter Spider Cookies turn soft peanut butter cookies into little edible spiders using mini peanut butter cups, melted chocolate, and candy eyes. They look impressive on a Halloween dessert table, but the decorating is simple enough for a family baking afternoon.
This easy Halloween cookie recipe combines the classic flavor of peanut butter and chocolate with a playful spider design. Serve them at Halloween parties, school celebrations where homemade treats are permitted, or a spooky movie night.
Quick answer: To make Peanut Butter Spider Cookies, bake small peanut butter cookies until their edges are lightly golden. Press a mini peanut butter cup into each warm cookie, let the cookies cool, then pipe chocolate legs and attach candy eyes with melted chocolate.
Why You’ll Love These Peanut Butter Spider Cookies
- Perfect for Halloween: The chocolate legs and candy eyes transform ordinary cookies into adorable spiders.
- Peanut butter and chocolate: Each cookie combines a soft peanut butter base with a chocolate-and-peanut-butter candy center.
- Easy to decorate: You only need a small piping bag or a zip-top bag with a tiny corner cut off.
- Great for parties: The spider design makes these cookies a fun addition to a Halloween dessert platter.
- Family-friendly baking: Kids can help place the candy eyes once the cookies have cooled enough to handle safely.
If you enjoy baking sweet treats, try these Crave Rockstar Cookies or make a loaf of Banana Bread with Honey for another homemade dessert option.
Ingredients You’ll Need
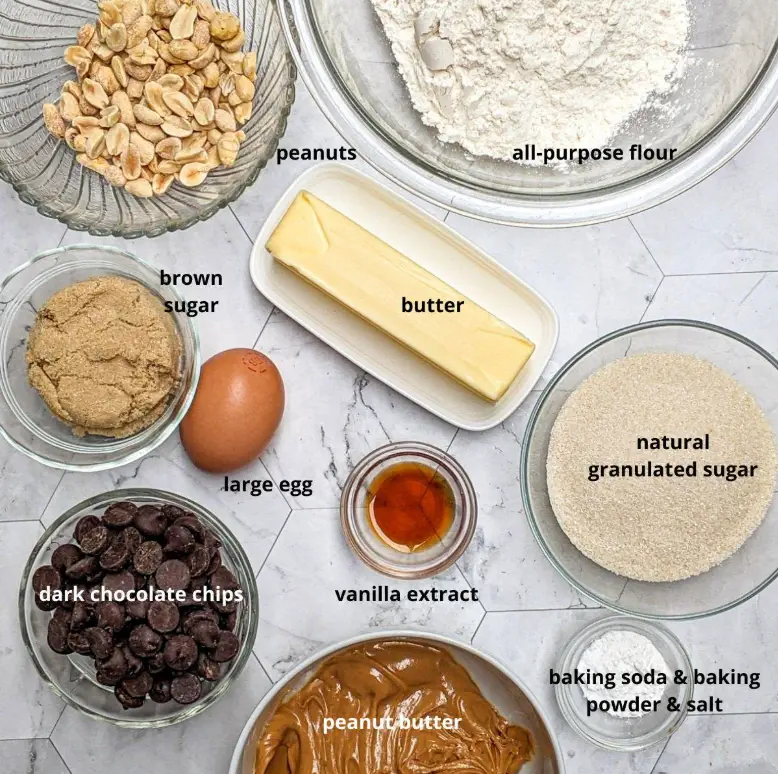
The recipe below is a practical starting formula for approximately 24 small cookies. Ingredient brands and cookie scoop sizes can affect the final yield, so test the first batch and adjust the size or baking time if needed.
- All-purpose flour: Provides structure for the cookie dough.
- Baking soda: Helps the cookies spread and develop a tender texture.
- Salt: Balances the sweetness.
- Unsalted butter: Adds richness and helps create a soft cookie.
- Creamy peanut butter: Gives the cookies their signature nutty flavor. Use conventional creamy peanut butter rather than a very oily natural variety for more predictable results.
- Granulated sugar: Sweetens the dough and supports the cookie texture.
- Brown sugar: Adds moisture and a light caramel note.
- Egg: Helps bind the ingredients together.
- Vanilla extract: Adds warmth and rounds out the flavor.
- Mini peanut butter cups: Form the spider’s body.
- Semi-sweet chocolate chips: Create the spider legs and help attach the eyes.
- Candy eyes: Complete the Halloween spider design.
Ingredient measurements
For a test batch of about 24 small cookies, start with:
- 1¼ cups (about 156 g) all-purpose flour
- ½ teaspoon baking soda
- ¼ teaspoon salt
- ½ cup (113 g) unsalted butter, softened
- ½ cup (about 128 g) creamy peanut butter
- ⅓ cup (67 g) granulated sugar
- ⅓ cup (about 73 g) packed light brown sugar
- 1 large egg
- 1 teaspoon vanilla extract
- 24 mini peanut butter cups, unwrapped
- ½ cup (about 85 g) semi-sweet chocolate chips, plus more if needed
- 48 small candy eyes
Recipe testing note: Confirm these measurements and the final yield in your own kitchen before publishing them as a tested recipe. Different mini peanut butter cup sizes and dough portions can change how many cookies the batch makes.
Equipment
- Large mixing bowl
- Hand mixer or stand mixer
- Measuring cups and spoons or a kitchen scale
- Baking sheets
- Parchment paper
- Cookie scoop or tablespoon
- Microwave-safe bowl
- Piping bag or small zip-top bag
- Wire cooling rack
How to Make Peanut Butter Spider Cookies
1. Prepare the oven and baking sheets
Preheat the oven to 350°F (177°C). Line two baking sheets with parchment paper.
Unwrap the mini peanut butter cups before baking so they are ready to add as soon as the cookies come out of the oven.
2. Mix the dry ingredients
In a medium bowl, whisk together the flour, baking soda, and salt. Set the mixture aside.
3. Cream the butter, peanut butter, and sugars
In a separate large bowl, beat the softened butter, creamy peanut butter, granulated sugar, and brown sugar until the mixture looks smooth and creamy.
Add the egg and vanilla extract. Beat until combined, scraping down the sides of the bowl as needed.
4. Make the cookie dough
Add the dry ingredients to the peanut butter mixture. Mix on low speed just until no dry flour remains.
Avoid overmixing, which can make cookies firmer than intended. If the dough feels unusually soft, refrigerate it briefly before portioning.
5. Shape the cookies
Scoop the dough into approximately 24 small portions, keeping them similar in size so they bake evenly. Arrange them on the prepared baking sheets, leaving about 2 inches between portions.
6. Bake the cookies
Bake for approximately 8–11 minutes, checking early because oven temperatures and dough portions vary.
The edges should look set and lightly golden while the centers remain slightly soft. Do not wait for the cookies to become deeply browned; they will continue to firm up as they cool.
7. Add the peanut butter cup bodies

Remove the baking sheet from the oven and immediately press one mini peanut butter cup into the center of each warm cookie. Press gently so the cookie stays intact.
Let the cookies rest on the baking sheet until they are firm enough to move without breaking. Transfer them to a wire rack and allow them to cool before decorating.
8. Melt the chocolate
Place the semi-sweet chocolate chips in a microwave-safe bowl. Heat in short 15–20 second intervals, stirring between each interval, until smooth.
Let the chocolate cool slightly so it is pipeable rather than runny. Transfer it to a piping bag or a zip-top bag with a very small corner cut off.
9. Pipe the spider legs
Pipe four short legs on each side of the peanut butter cup, aiming for eight legs in total. Draw the lines onto the cookie around the candy body, allowing the chocolate to set before moving the cookies.
For the neatest result, practice the leg shapes on parchment paper first.
10. Add the candy eyes
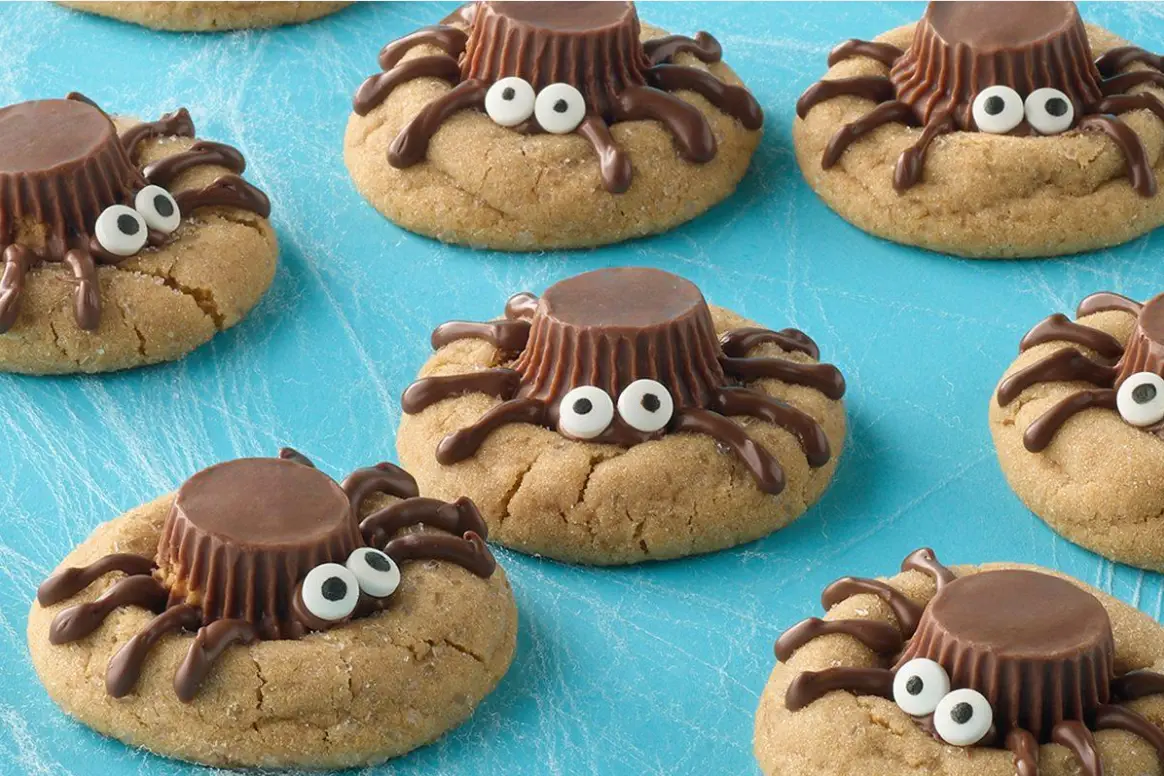
Use a tiny dot of melted chocolate to attach two candy eyes to each peanut butter cup. Let the chocolate set completely before serving or packing the cookies.
Tips for the Best Halloween Spider Cookies
- Use similar dough portions: Evenly sized cookies bake at a more consistent rate.
- Add the candy while the cookies are warm: The peanut butter cups can settle into the cookie more easily while the cookies are still soft.
- Decorate only after cooling: If the cookies are too warm, the chocolate legs may spread and the candy eyes may slide.
- Keep the chocolate pipeable: If it becomes too thick, warm it briefly and stir again.
- Make the legs thin: Fine chocolate lines look more like spider legs and are less likely to overwhelm the cookie.
- Use parchment paper: It makes the cookies easier to lift and helps keep the baking sheets clean.
- Test one cookie first: If your dough portions are larger or smaller, adjust the remaining baking time accordingly.
Easy Variations
Chocolate peanut butter spider cookies
Use milk chocolate or dark chocolate chips for the legs. Dark chocolate creates a stronger contrast against the peanut butter cups.
Extra-cute Halloween cookies
Use small candy eyes and pipe short, slightly curved legs. You can vary the eye placement to give each spider a different expression.
A party dessert platter
Arrange the spider cookies alongside brownies, sugar cookies, and other Halloween treats. For another sweet baking idea, explore more recipes on RecipeCrave.
Peanut-free alternative
If you’re baking for someone with a peanut allergy, do not simply replace the peanut butter and peanut butter cups without checking the other ingredients. Choose a suitable alternative recipe and verify every product label. Prevent cross-contact by cleaning hands, equipment, and work surfaces; review the FDA’s food-allergy information.
How to Store Peanut Butter Spider Cookies
Let the chocolate decorations set fully before storing the cookies in an airtight container.
- Room temperature: Store in a cool, dry place and follow the storage directions on the candy packaging. For best texture, enjoy within about 3–4 days.
- Refrigerator: Refrigeration may firm up the chocolate and cookie texture. Use an airtight container to protect the cookies from moisture and odors.
- Freezing: Freeze undecorated cookies if possible, then thaw and add the chocolate legs and candy eyes after thawing. If freezing fully decorated cookies, separate layers with parchment and expect some decoration damage.
For general food-handling guidance, see the USDA’s food-safety basics.
Frequently Asked Questions
Can I make Peanut Butter Spider Cookies ahead of time?
Yes. Bake the cookies ahead and let them cool completely. You can decorate them the same day or later, provided they are stored properly in an airtight container.
Why are my peanut butter cookies crumbly?
The dough may contain too much flour, may have been overbaked, or may have been mixed with a peanut butter brand that behaves differently. Measure flour carefully and remove the cookies when the edges are set and lightly golden.
When should I add the mini peanut butter cups?
Press them into the cookies immediately after baking while the cookies are still soft. Handle the hot baking sheet carefully, and let the cookies cool before moving or decorating them.
How do I stop the chocolate spider legs from smearing?
Allow the cookies to cool completely before piping. Use chocolate that is smooth but not overly warm, and let the finished decorations set before stacking the cookies.
Can I use regular-size peanut butter cups?
You can, but larger candies may overwhelm small cookies. Make larger dough portions and adjust the baking time if you choose regular-size cups.
Are Peanut Butter Spider Cookies suitable for people with nut allergies?
No. This recipe contains peanut butter and peanut butter cups, and other ingredients may contain additional allergens or traces. Do not serve it to someone with a peanut allergy. Check product labels and avoid cross-contact.
Can kids help make these Halloween cookies?
Yes, with adult supervision. Children can help portion dough, place candy eyes on cooled cookies, and arrange the finished treats. Adults should handle the oven and hot baking sheets.
More Recipes to Try
If you enjoyed these Peanut Butter Spider Cookies, explore more homemade treats and family-friendly recipes:
For another take on this Halloween favorite, visit Peanut Butter Spider Cookies on QuikyKitchen.
Final Thoughts
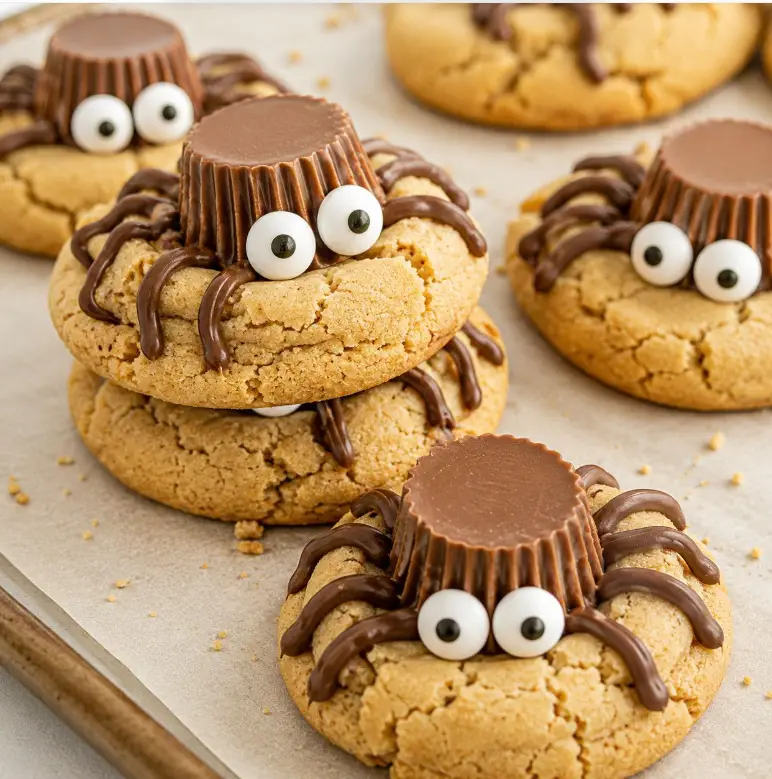
These Peanut Butter Spider Cookies bring together soft peanut butter cookies, chocolate, candy eyes, and a playful Halloween design. With a simple decorating method and easy-to-find ingredients, they make a memorable addition to a Halloween party or seasonal baking tray.
Bake the cookies, let them cool, add the chocolate legs, and enjoy your homemade spider treats!



Pingback: Witches Brew Punch: Easy 3-Ingredient Halloween Drink